


 New
New


 Play QuickTime version
  Play Flash version
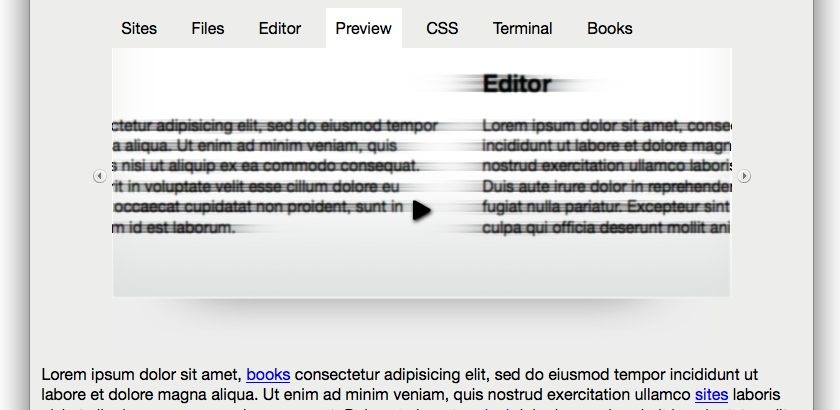
How to Solve the Problem
Recreating this effect is simple to do if you know what plugins to use. There are plugins out in the wild already, but we want our jQuery to satisfy the following requirements:
- Degrades perfectly without JavaScript enabled
- Sliding panels effect without hogging browser CPU
- Next and previous buttons added using JavaScript because they hold no use without JavaScript
- Hitting the page with a specific hash (i.e. page.html#preview) shows the right tab, and highlights the right navigation
- Any link on the page that refers back to a panel should trigger the effect and highlight the right navigation – this should happen without any extra work
The hash is the emphasised part (including the # symbol) in: http://jqueryfordesigners.com/page.html#example
In fact, our version of this slider will be better than Panic’s and the current jQuery plugins if we can meet all of the requirements.
For example, in the Panic example linking directly to the preview pane doesn’t correctly highlight the navigation.
This whole solution is going to rely heavily on Ariel Flesler’s scrollTo plugin and particularly it’s ‘adapters’ to enhance the power of the scrollTo plugin.
I’ve provided a screencast to walk through how create this functionality. Details on how and what I used can be found below.
Watch the coda slider effect screencast (alternative flash version)
QuickTime version is approx. 90Mb, flash version is streaming – I’ve also noticed the sound is slightly over to the left – I’ll fix that for next time!)
View the demo and source code used in the screencast
Plugins Required
Along with jQuery we’ll need the following plugins – I recommend using the minified versions for production, and perhaps even development (download links can be found at the bottom of the linked pages):
Markup
Requirement 1: degrades perfectly without JavaScript enabled
To ensure this works without JavaScript, we will use the CSS overflow property to control the effect.
This way our panels will still focus in to view if a user clicks, or if the URL refers to a specific panel.
HTML
It’s worth noting that although we could scroll the individual panels inside a single nested DIV, for the JavaScript to make the effect work, it will be a nested DIV that will scroll – not the individual panels. You can see this in the markup below:
<div id="slider">
  <ul class="navigation">
    <li><a href="#sites">Sites</a></li>
    <li><a href="#files">Files</a></li>
    <li><a href="#editor">Editor</a></li>
    <li><a href="#preview">Preview</a></li>
    <li><a href="#css">CSS</a></li>
    <li><a href="#terminal">Terminal</a></li>
    <li><a href="#books">Books</a></li>
  </ul>

  <!-- element with overflow applied -->
  <div class="scroll">
    <!-- the element that will be scrolled during the effect -->
    <div class="scrollContainer">
      <!-- our individual panels -->
      <div class="panel" id="sites"> ... </div>
      <div class="panel" id="files"> ... </div>
      <div class="panel" id="editor"> ... </div>
      <div class="panel" id="preview"> ... </div>
      <div class="panel" id="css"> ... </div>
      <div class="panel" id="terminal"> ... </div>
      <div class="panel" id="books"> ... </div>
    </div>
  </div>
</div>
That’s it. Without CSS this markup works perfectly for our content, almost exactly the way tabs work without JavaScript and CSS.
CSS
I won’t detail all the CSS like the navigation or shading effects – just the CSS required to correctly create the effect.
#slider {
  width: 620px;
  margin: 0 auto;
  position: relative;
}

.scroll {
  height: 250px;
  overflow: auto;
  position: relative; /* fix for IE to respect overflow */
  clear: left;
  background: #FFFFFF url(images/content_pane-gradient.gif) repeat-x scroll left bottom;
}

.scrollContainer div.panel {
  padding: 20px;
  height: 210px;
  width: 580px; /* change to 560px if not using JS to remove rh.scroll */
}
Note also that I’m choosing to use overflow: auto; – this way, if the user does have JavaScript disabled, there will be a visual que that the panels can be scrolled. If you want to remove the horizontal scroll in IE, I would recommend changing .scrollContainer div.panel‘s width to 560px to account for the right hand scrollbar.
I also plan to include scrolling buttons to go left and right. Although the elements will be created by the JavaScript, we’ll still need the CSS to place the buttons in the right place. Our JavaScript will put the buttons before and after the outer div.scroll element. We have to use absolute positioning to place them, so this is why #slider has position: relative; applied:
.scrollButtons {
  position: absolute;
  top: 150px;
  cursor: pointer;
}

.scrollButtons.left {
  left: -20px;
}

.scrollButtons.right {
  right: -20px;
}
jQuery
Requirement 2: Sliding panels effect without hogging browser CPU
If you try this effect using CSS, to use positioning to move the panels around it will eat up your CPU, and the browser will no likely lock up. This is why we’re using Ariel’s scrollTo pluing. The scrollTo plugin literally scrolls the element via it’s overflow (or can be used to scroll the actual window).
Required Plugins
<script src="jquery-1.2.6.min.js" type="text/javascript"></script>

<script src="jquery.scrollTo-1.3.3-min.js" type="text/javascript"></script>
<script src="jquery.localscroll-1.2.5-min.js" type="text/javascript"></script>
<script src="jquery.serialScroll-1.2.1-min.js" type="text/javascript"></script>
Next and Previous Buttons
Requirement 3: Back and forward buttons added
This is easy vanilla jQuery, here’s the snippet from the final code:
var $scroll = $('#slider .scroll');

$scroll
  .before('<img class="scrollButtons left" src="images/scroll_left.png" />')
  .after('<img class="scrollButtons right" src="images/scroll_right.png" />');
Note the classes I’ve applied the scrollButtons to the images so they’ll be positioned properly.
Navigation Updates Automatically
Requirement 4: Hitting the page with a specific hash highlights the right navigation
This is one of the key features that I felt was important to the slider. If I navigated to a specific panel, the navigation should match.
This is achieved using event binding. When the scroll plugin completes it’s effect, it will call our trigger function.
The trigger function will receive the ID of the element it has just shown, and search for the navigation item whose href’s hash matches the ID.
For example, if the div#sites element is shown, the ID ‘sites’ is sent to our trigger. Our trigger function will now look for links in the navigation that end with ‘#sites’: <a href="#sites">Sites</a>.
This trigger function will be attached to the onAfter property in the scroll options and called when the page loads for the first time with a hash in the URL.
// bind the navigation clicks to update the selected nav:
$('#slider .navigation').find('a').click(selectNav);

// handle nav selection - lots of nice chaining :-)
function selectNav() {
  $(this)
    .parents('ul:first') // find the first UL parent
      .find('a') // find all the A elements
        .removeClass('selected') // remove from all
      .end() // go back to all A elements
    .end() // go back to 'this' element
    .addClass('selected');
}

function trigger(data) {
  // within the .navigation element, find the A element
  // whose href ends with ID ($= is ends with)
  var el = $('#slider .navigation').find('a[href$="' + data.id + '"]').get(0);

  // we're passing the actual element, and not the jQuery instance.
  selectNav.call(el);
}
I’ve had to separate out the selectNav function because it also be called when the user clicks on the navigation links.
To complete this requirement, once the page is loaded, we need to check whether there is a hash on the URL, and if so, trigger the ‘scrollerComplete’ function:
if (window.location.hash) {
  trigger({ id : window.location.hash.substr(1)});
} else {
  $('#slider .navigation a:first').click();
}
By default, we’re triggering a click to the first navigation item if there’s no hash on the URL.
Any Link Triggers Effect
Requirement 5: Any link on the page that refers back to a panel should trigger the effect
Since we’re all lazy developers, we don’t want to have to specifically markup arbitrary links on the page that should trigger this effect.
This is where Ariel’s localScroll plugin comes to the rescue. By just applying that plugin with our default settings any link on the page will trigger the effect. In addition, because we’re going to trigger our ‘scrollerComplete’ function when the effect has finished, it will correctly select the navigation associated.
The jQuery Code
Here’s the code with all the above requirements added in. The code is commented to explain what we’re doing.
I’ve also decided to include a bonus requirement – to support both horizontal or vertical scrolling.
// when the DOM is ready...
$(document).ready(function () {

var $panels = $('#slider .scrollContainer > div');
var $container = $('#slider .scrollContainer');

// if false, we'll float all the panels left and fix the width
// of the container
var horizontal = true;

// float the panels left if we're going horizontal
if (horizontal) {
  $panels.css({
    'float' : 'left',
    'position' : 'relative' // IE fix to ensure overflow is hidden
  });

  // calculate a new width for the container (so it holds all panels)
  $container.css('width', $panels[0].offsetWidth * $panels.length);
}

// collect the scroll object, at the same time apply the hidden overflow
// to remove the default scrollbars that will appear
var $scroll = $('#slider .scroll').css('overflow', 'hidden');

// apply our left + right buttons
$scroll
  .before('<img class="scrollButtons left" src="images/scroll_left.png" />')
  .after('<img class="scrollButtons right" src="images/scroll_right.png" />');

// handle nav selection
function selectNav() {
  $(this)
    .parents('ul:first')
      .find('a')
        .removeClass('selected')
      .end()
    .end()
    .addClass('selected');
}

$('#slider .navigation').find('a').click(selectNav);

// go find the navigation link that has this target and select the nav
function trigger(data) {
  var el = $('#slider .navigation').find('a[href$="' + data.id + '"]').get(0);
  selectNav.call(el);
}

if (window.location.hash) {
  trigger({ id : window.location.hash.substr(1) });
} else {
  $('ul.navigation a:first').click();
}

// offset is used to move to *exactly* the right place, since I'm using
// padding on my example, I need to subtract the amount of padding to
// the offset.  Try removing this to get a good idea of the effect
var offset = parseInt((horizontal ?
  $container.css('paddingTop') :
  $container.css('paddingLeft'))
  || 0) * -1;


var scrollOptions = {
  target: $scroll, // the element that has the overflow

  // can be a selector which will be relative to the target
  items: $panels,

  navigation: '.navigation a',

  // selectors are NOT relative to document, i.e. make sure they're unique
  prev: 'img.left',
  next: 'img.right',

  // allow the scroll effect to run both directions
  axis: 'xy',

  onAfter: trigger, // our final callback

  offset: offset,

  // duration of the sliding effect
  duration: 500,

  // easing - can be used with the easing plugin:
  // http://gsgd.co.uk/sandbox/jquery/easing/
  easing: 'swing'
};

// apply serialScroll to the slider - we chose this plugin because it
// supports// the indexed next and previous scroll along with hooking
// in to our navigation.
$('#slider').serialScroll(scrollOptions);

// now apply localScroll to hook any other arbitrary links to trigger
// the effect
$.localScroll(scrollOptions);

// finally, if the URL has a hash, move the slider in to position,
// setting the duration to 1 because I don't want it to scroll in the
// very first page load.  We don't always need this, but it ensures
// the positioning is absolutely spot on when the pages loads.
scrollOptions.duration = 1;
$.localScroll.hash(scrollOptions);

});
Wrap UP
That’s everything you need for the perfect slider. Ariel has lots of other examples of how the scroll plugins can be used on his web site so do check them out.
I’ll also be posting a follow up to last month’s survey.
If anyone has any questions, suggestions or better examples, please do share by dropping a comment on the site.
You should follow me on Twitter here I tweet about jQuery amongst the usual tweet-splurges!